Sungazer Stud
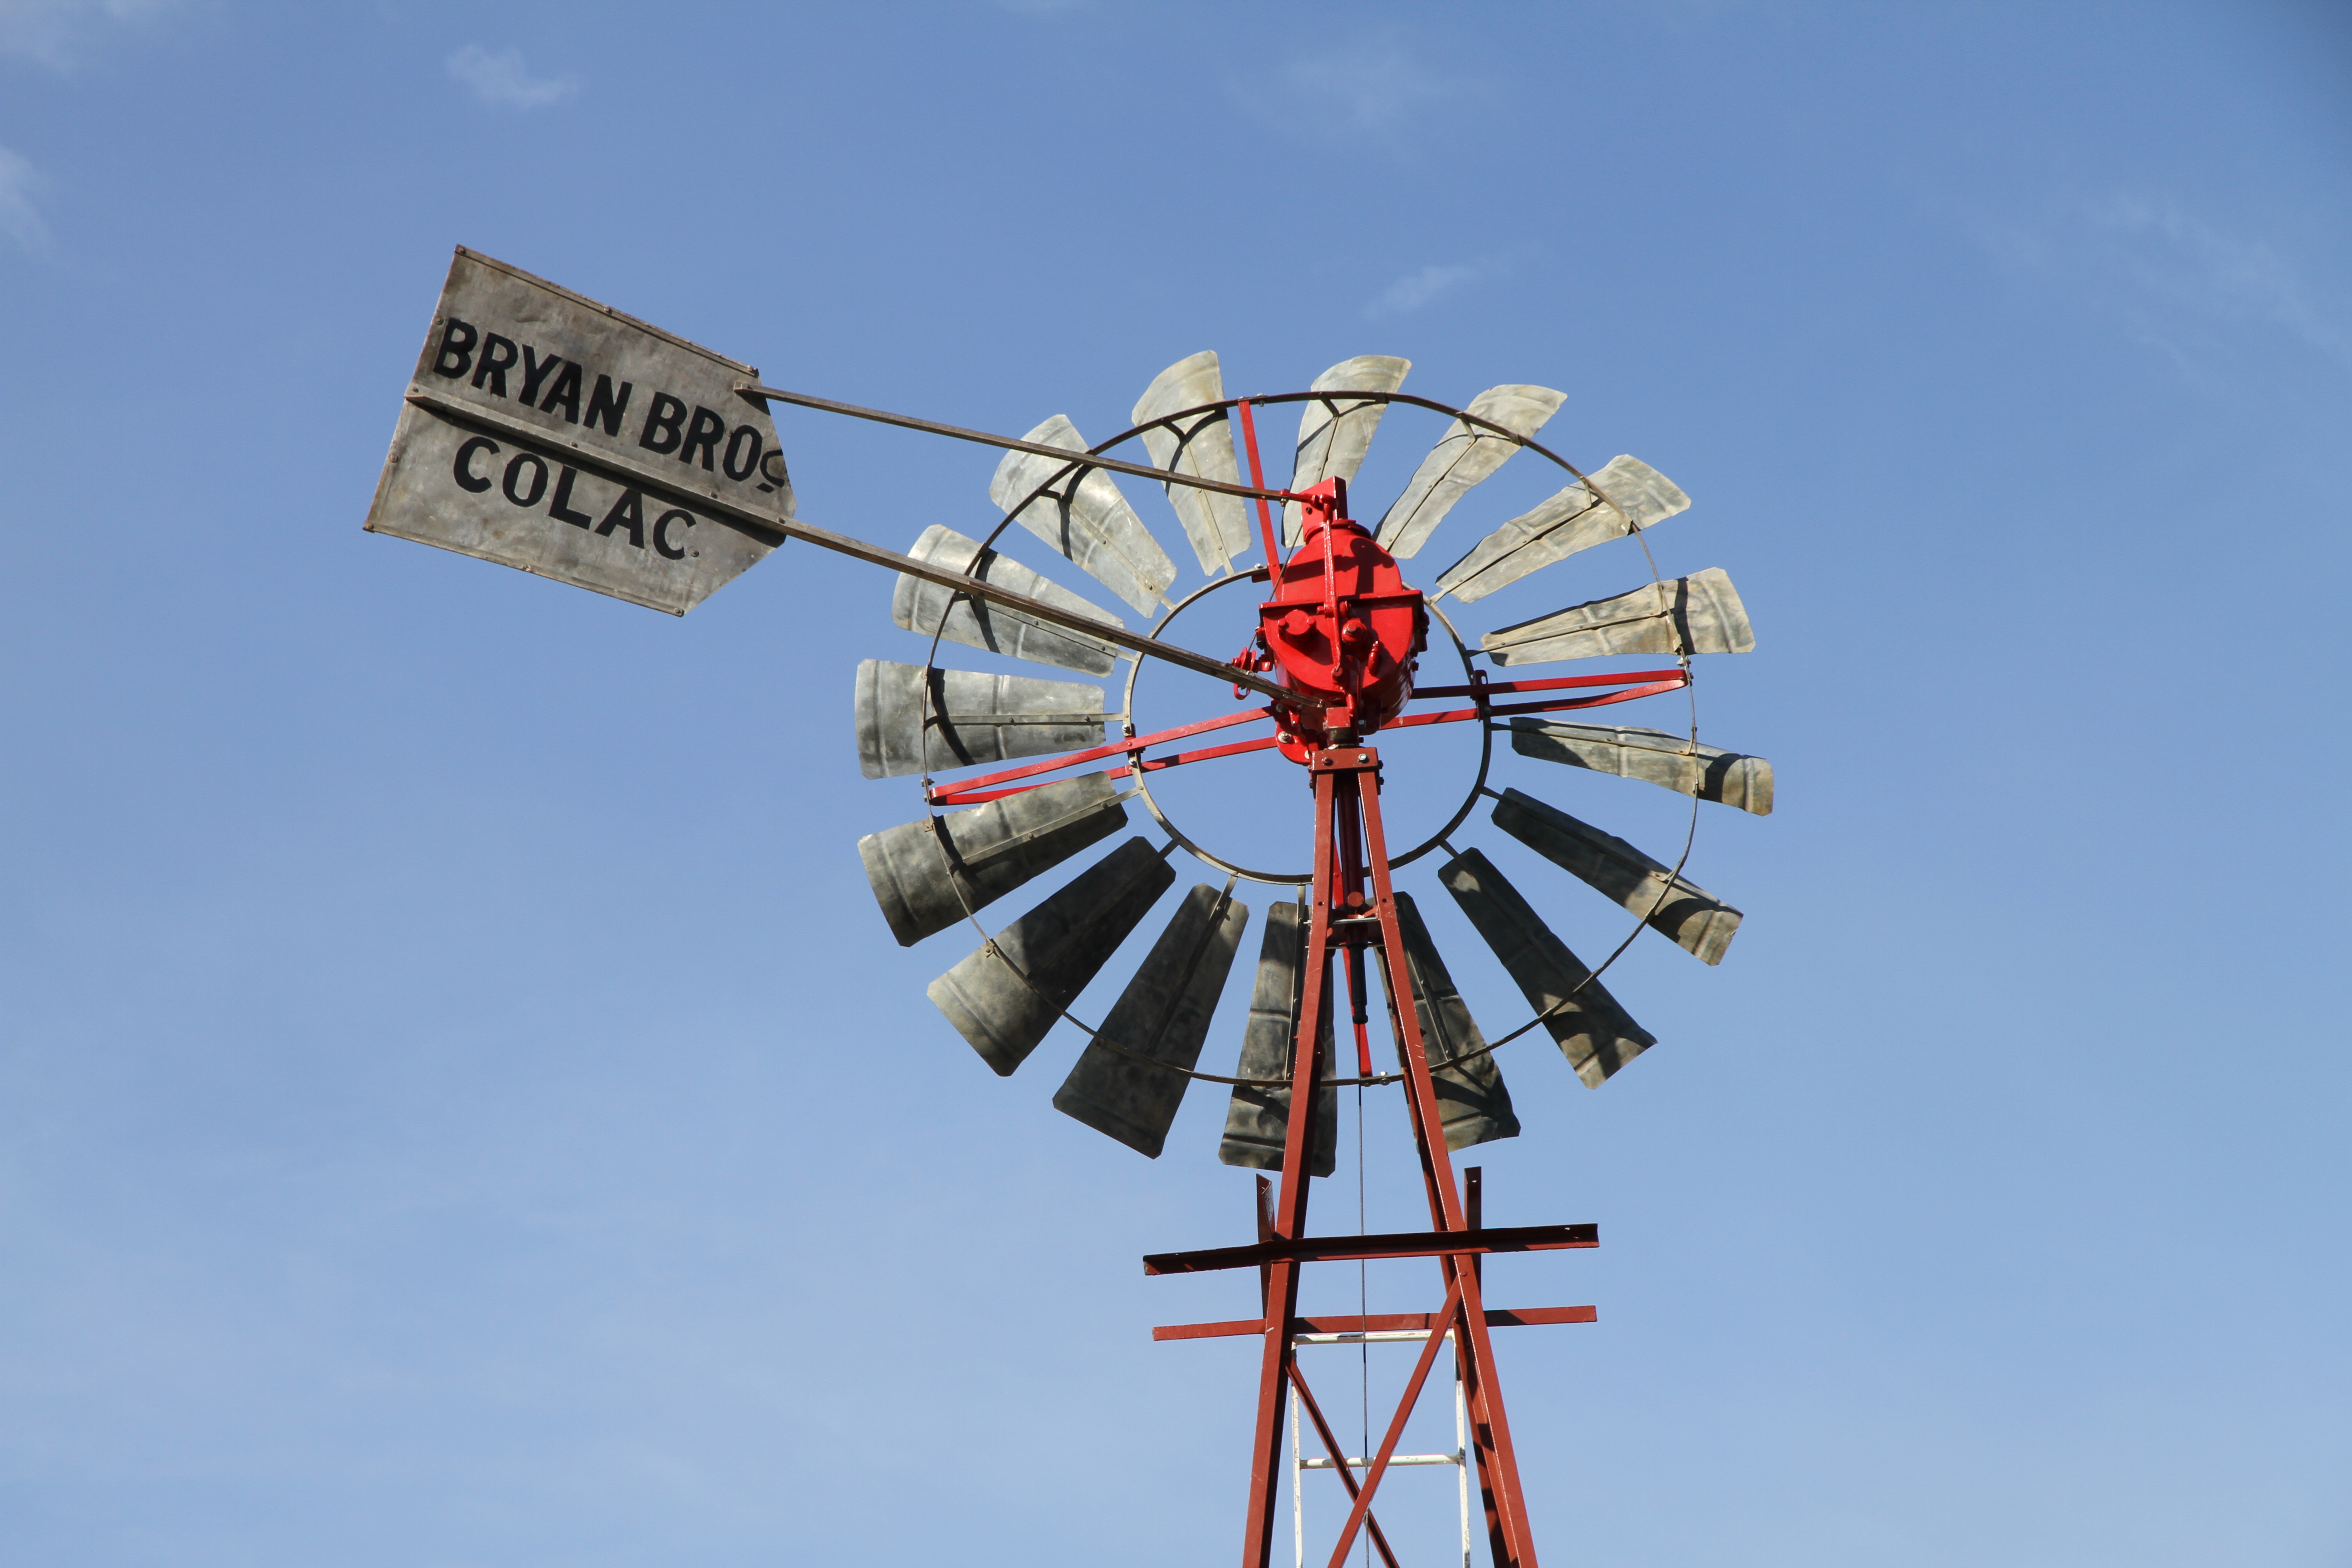
Bryan Brothers Cyclone Windmill
circ 1924
As with many projects I did not start out with the intent of purchasing a windmill and restoring it. Having a windmill by the side of the dam in the backyard, however, was a vision and a plan I envisioned from the day I purchased the property over 20 years ago.
The day started in response to buying a seeder on ebay and travelling out to the property to pick it up after winning the auction. What I found was a property that appeared to have been previously owned by a hoarder and was now being cleared. The property had everything from large headers, vintage cars, trucks, and wooden wagons down to the smallest set of playing cards - it was akin to a tip, or a project guy’s paradise. I found myself making several trips with the truck out there and picked up a few odds and ends from the very friendly and helpful new owners. On the property I found several windmills in parts on the ground. I knew nothing about windmills but one in particular caught my eye. I think it was the full cast iron gearbox that attracted me the most; the fan was not attached and badly bent. The tail was a few feet away and the tower was on its side and also bent out of shape. I looked hard to find any other parts, such as a pump or anything else that could have been part of it as the parts I had identified were spread over quite an area. A closer look at the tail revealed the brand name and where it was from. The brand was Bryan Bros which meant nothing to me but on the reverse side of the tail was the town of manufacture which was Colac. This was the deal sealer for me as my family history had strong ties to Colac so it seemed like it was fate or destiny. So a deal was made along with a tank stand, a ladder that was made from solid steel, and some other assorted pieces. The sellers and some of their friends loaded the truck up for me and that was the start of the Windmill project.
I purchased the farm as a green field site without even any boundary fences. Hence there have been many projects over the years to get the farm to where it is now. Here are some of the more interesting projects.
Bryan Brothers 1924 Cyclone Windmill
This was a quite a interesting restoration figuring out what I had how it worked and how I could replace and or repair some of the parts and how to integrate some of today's parts into the design so that it lasts another 100 years.
I Could not have done that without the help from Peter at Bryan Windmills. Yes that is right they are still in business after all these years and if my experience of their customer support is anything to go by the will be in business for a long time to come.
You can contact them at This email address is being protected from spambots. You need JavaScript enabled to view it.u
Pete Morrissy
2-8 Wilson St
Colac 3250
Phone
(03)52321010
Fax
(03)52311767
Mobile
0429 321020
or visit their website http://www.bryanwindmills.com.au
Bryan Windmill Research
The first thing I did when I got it home was to open it up. What I found was a gearbox full of red dried mud. The wasps must have made a nest in there at one time. So the first stage was to get the high pressure washer on it and give it a clean-up. It all looked pretty good at first glance but I could see some signs of wear on the mast pipe, and an obvious broken piece of cast iron that was the very top lid.

I really wanted to be able to rebuild this windmill and get it back into commission pumping water from a dam up to a header tank on the top of a hill that feeds the stock troughs for the cows. Then when full to overflow into a pipe that would feed small ponds above the dam a water the trees in this area. This job is currently done with a petrol powered water transfer pump a Davey fire fighter.
In its present state I had some parts and didn't know how they all fitted together and worked. I had a feeling I didn't have all the parts and even though it said Bryan Bros on the tail vane there was no guarantee that the tail vane was for this gearbox. So I started to do some looking on the web like everybody does these days and found a great resource in the The Morawa District Historical Society http://members.westnet.com.au/caladenia/index.html I sent an email off to their contact on the website and got a reply the same night a few emails back and forth and it looked like we had it identified. This was mainly due to a privately owned windmill park in Shepparton by Theo Cook. I was sent some pictures that Theo had given to the Historical Society and it looked like we had a match with a few discrepancies.
Bryan Windmills Colac the Company
The Company was started by the Bryan family and included several brothers Archie Mark BRYAN, Thomas Pearce BRYAN and George BRYAN and adeptly named BRYAN BROS. This was around 1888. There were two factories one in Colac and one in Footscray. Today the company is Operated as Bryan Windmills still in Colac although they have moved since the original factory.

I sent off an email to the contact on the website on a Sunday hoping to get a reply sometime in the next week but to my surprise I received an email from Peter Morrissy the owner of Bryan Windmills as they are now named. Great customer service you really couldn't get much better. My dad who was born and raised in Colac and I travelled to the new factory at 2-8 Wilson Street Colac. We took all the parts to the factory to see what information I could gain. The first reaction was "I have never seen one of those it may not be ours" but I was not fobbed off quite the opposite we took all the parts out into the factory to ask the head engineer who had worked for the company a long time. He too didn't recognise the particular gearbox. However we looked at one of their big windmill gearboxes that was also a cast iron model and the similarities made it undeniable that it was in fact one of theirs.
We spent about 3 hours with them going over the Windmill with them identifying parts that were worn, and being given ideas on how to either replace the entire piece or repair it. The time went so fast talking about how the windmill worked and how to take it apart what parts were missing, what the parts looked like today ect. When my dad and I were back in the car we both were so surprised at how helpful they had been giving their time and expertise to us.
This first meeting was enough to convince me that they were a company that would go out of their way to make sure you were fully satisfied with your interaction with them. I would recommend Bryan Windmills of Colac to anybody, but there was more to come than this first meeting that only confirmed their level of customer service so give Pete a call or send him an email This email address is being protected from spambots. You need JavaScript enabled to view it. For any of your windmill, irrigation, tanks and tank stands, or solar pump needs.
Bryan Windmill Restoration
The restoration followed the same procedure as any restoration. First take it all apart, clean it up, replace or repair any worn or broken parts and give it a new coat of paint. This is a brief rundown of what was done. There were many times that I did something and then wished I had taken a photo of it in its original state, but that's how it goes, sometimes you get so involved, you just concentrate on the job.
Once I had the gearbox apart I put the parts in a light acid wash to clean them up and remove any rust. There was an inch thick of gunge on the bottom of the gearbox from old oil. This was washed out and cleaned in a bath of diesel fuel. After the acid wash the parts got a clean up with the wire brush, sandpaper, or a grinding disc.
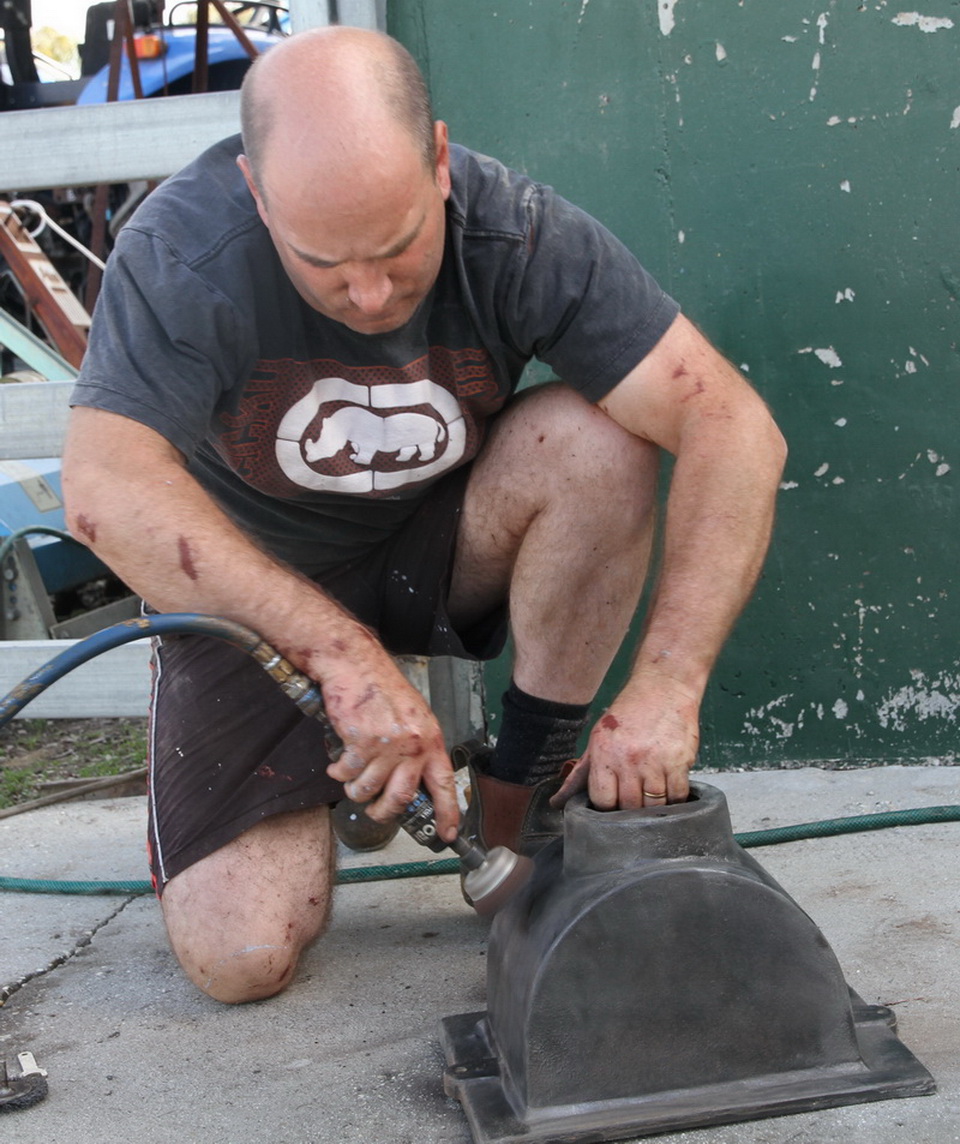
After they had been cleaned up I gave them a coat of paint with an industrial strength anti rust paint combination. First was an undercoat / primer then several coats of top colour, luckily the original colour was red which looks great so that what all the parts got.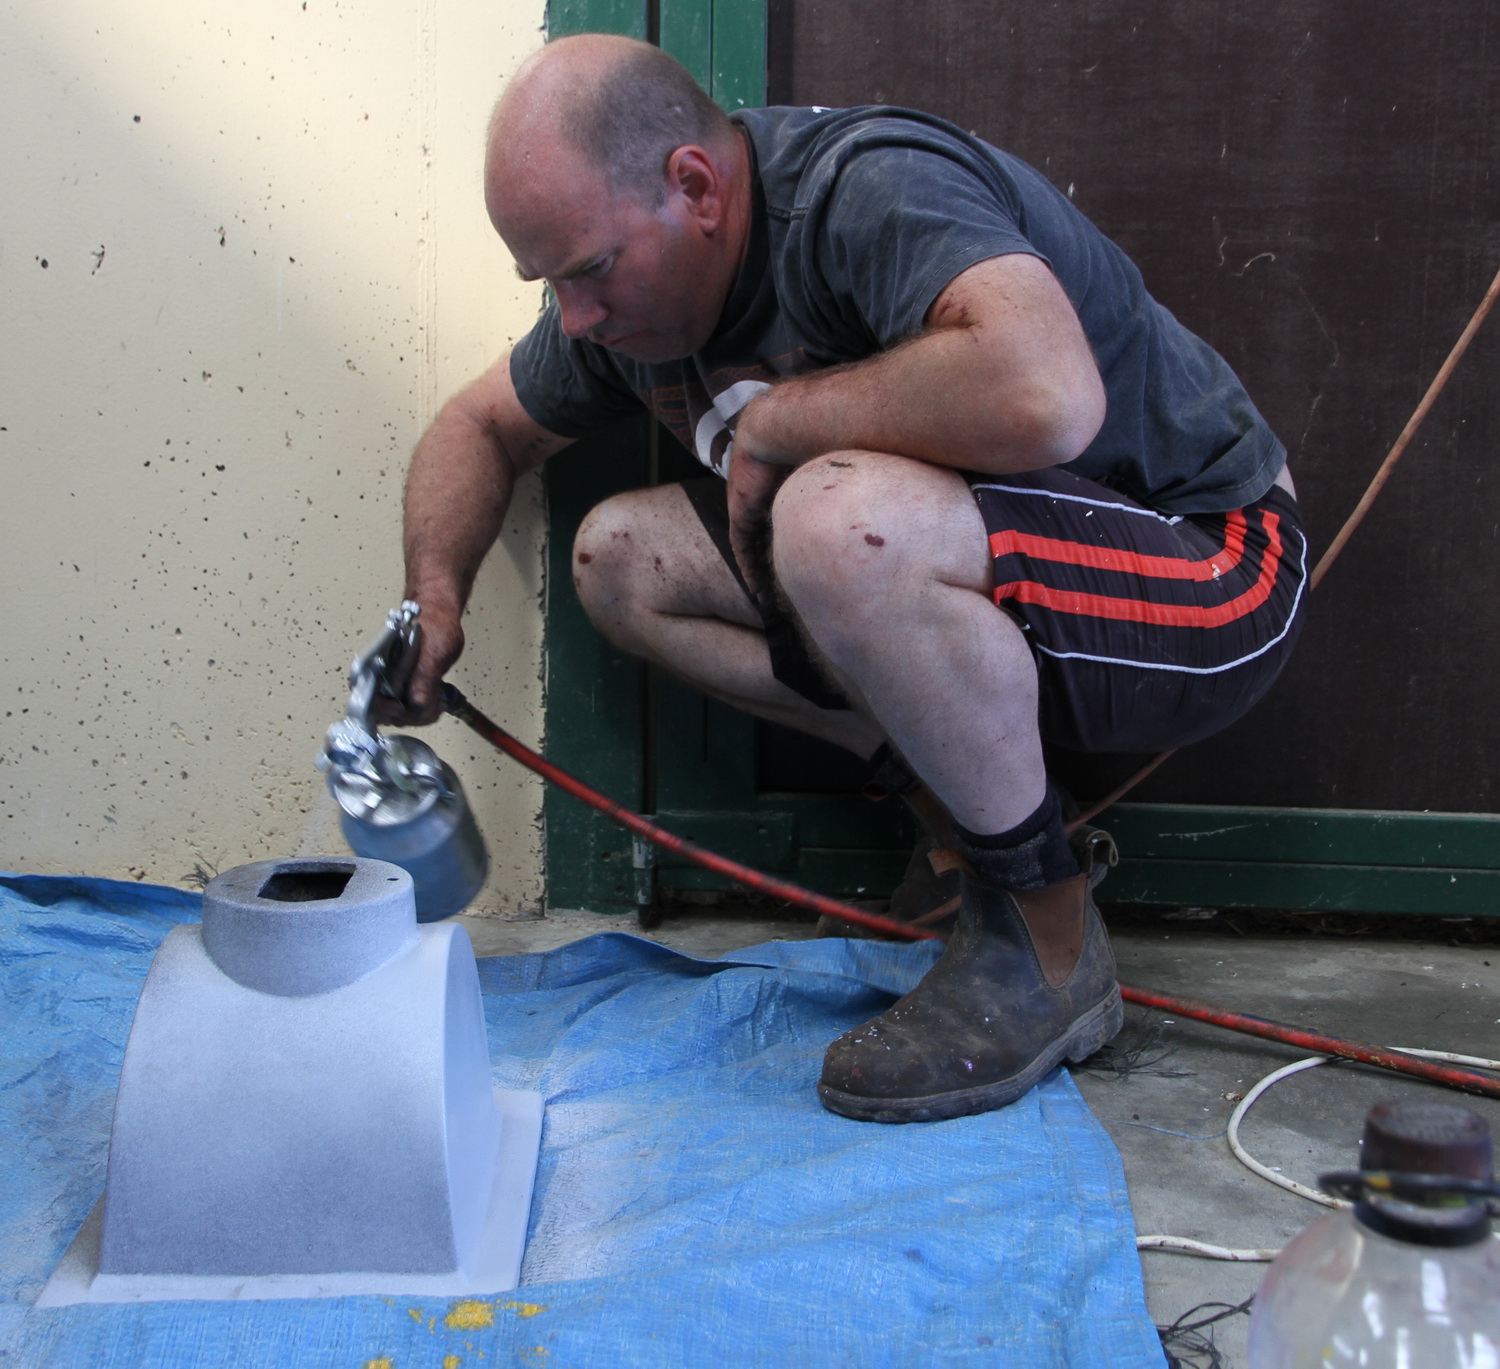
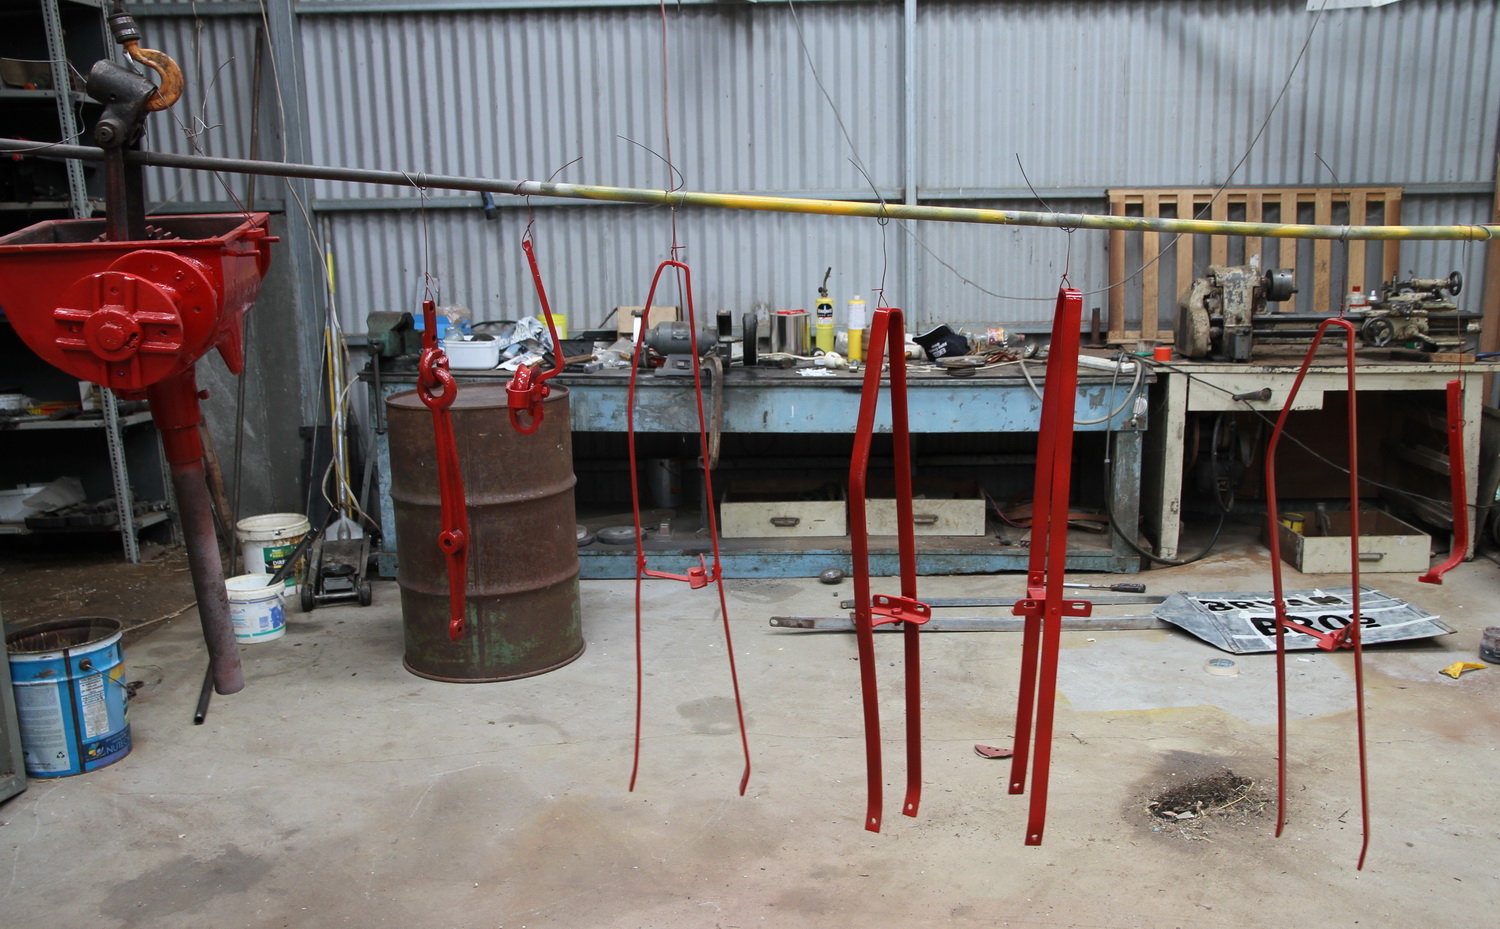
From top to bottom inside and out parts were given some attention.
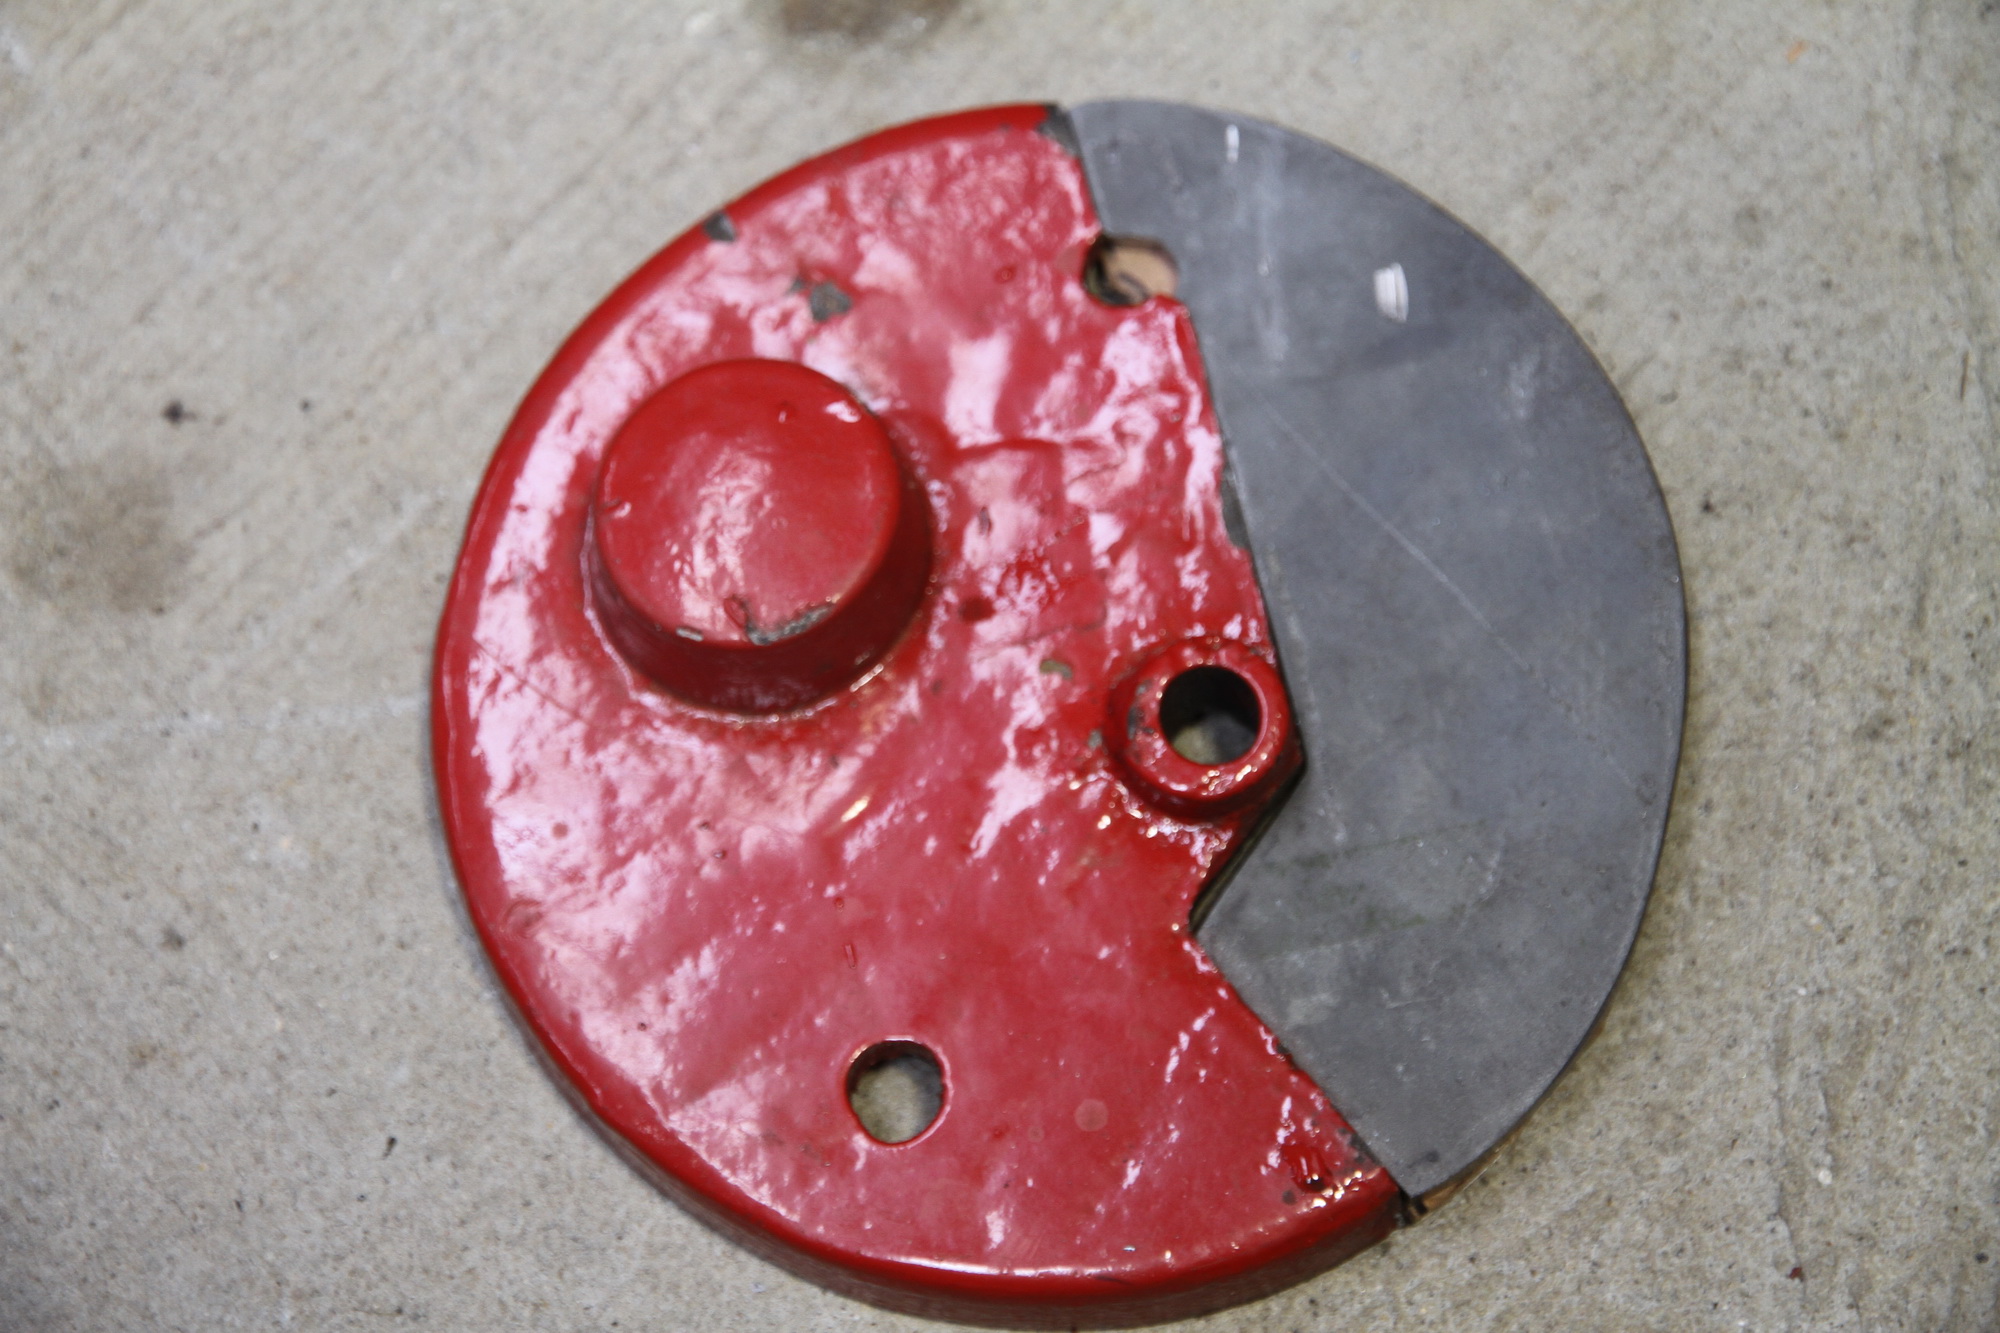
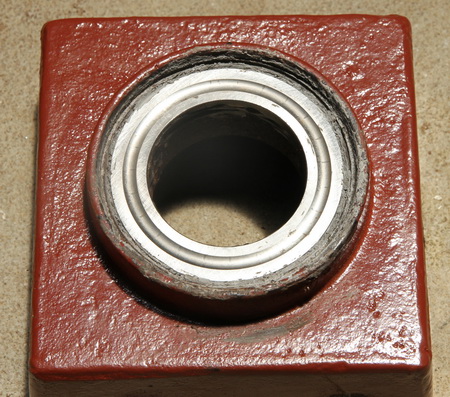
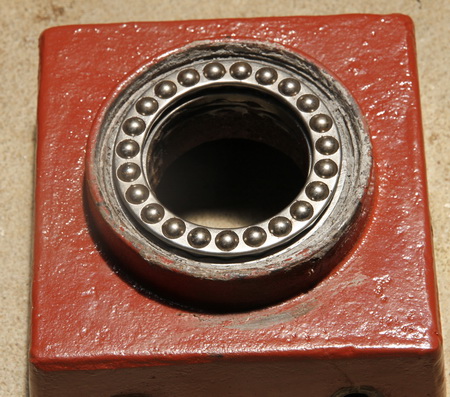
The top Bearing which the gearbox sits on was well ? I only had half of the casings and no ball bearings not that I think they could have been reused.
It used to be a cast top and bottom with loose ball bearings sitting in the races.
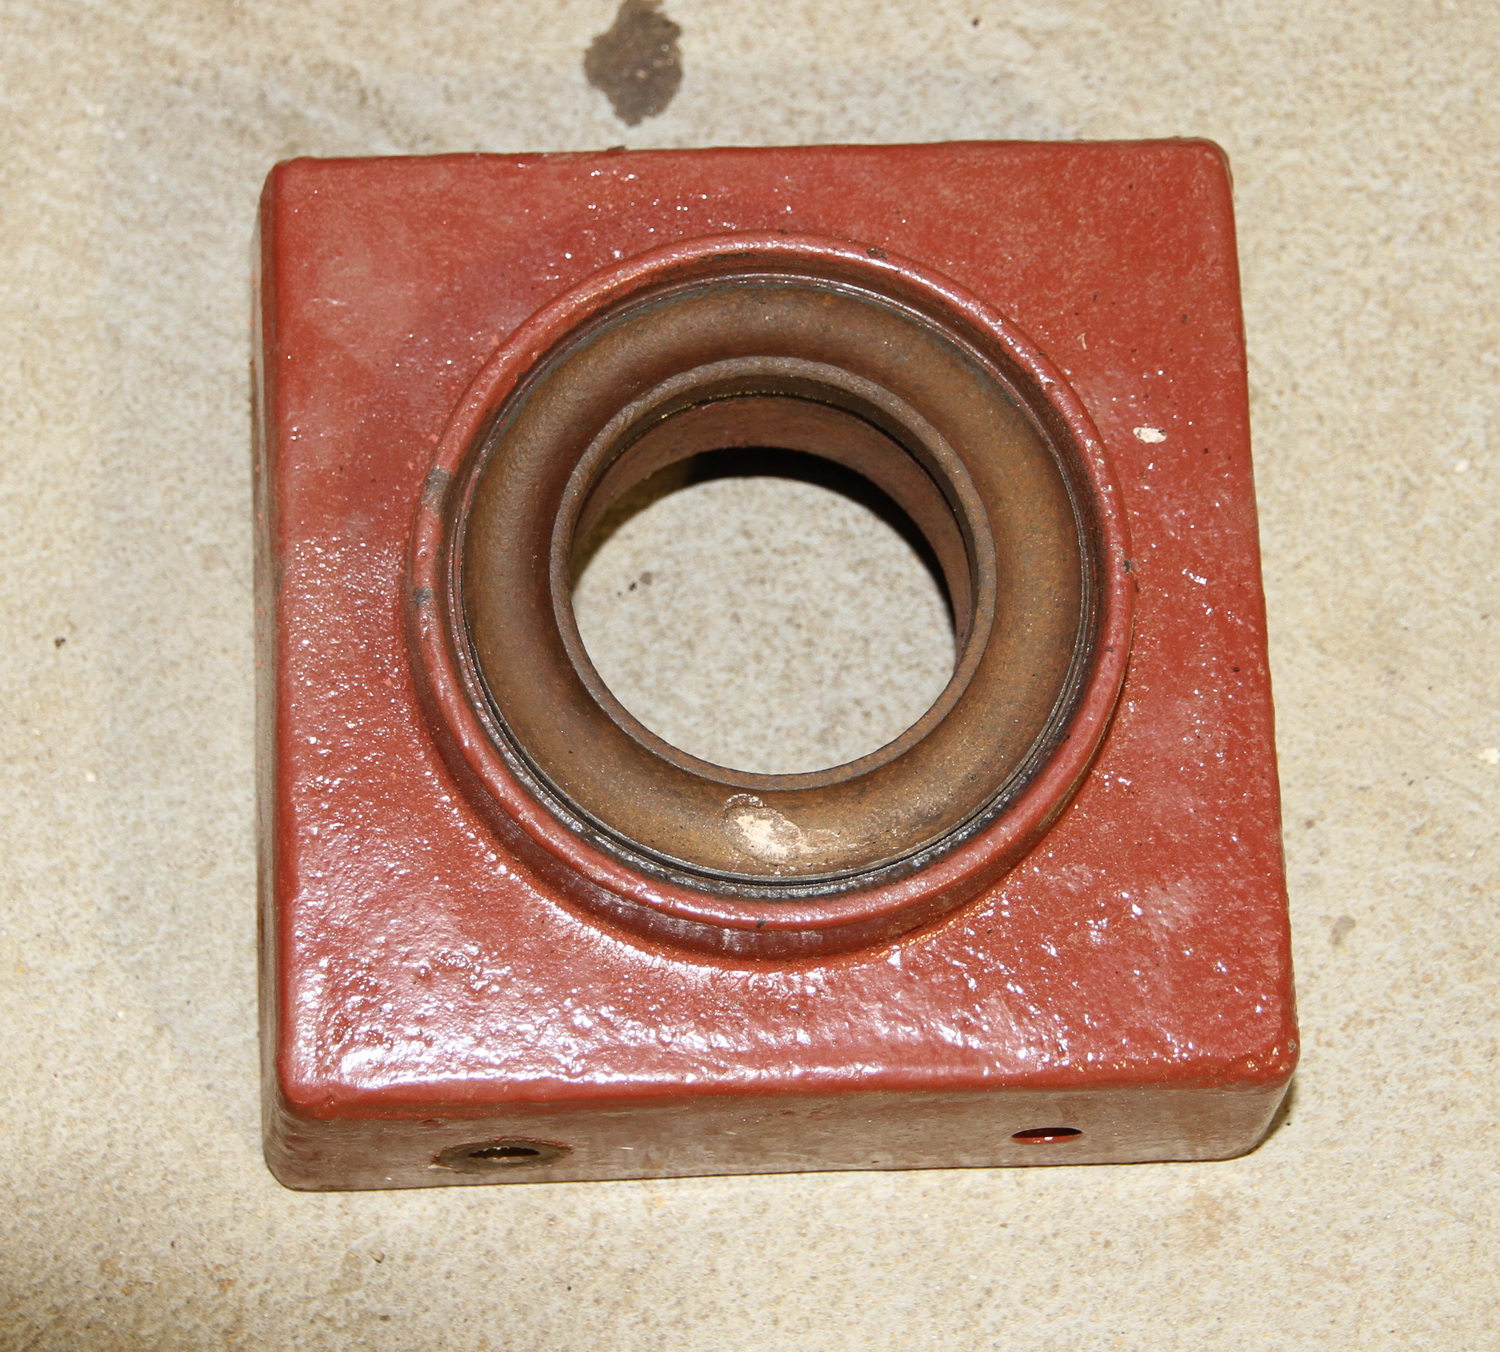
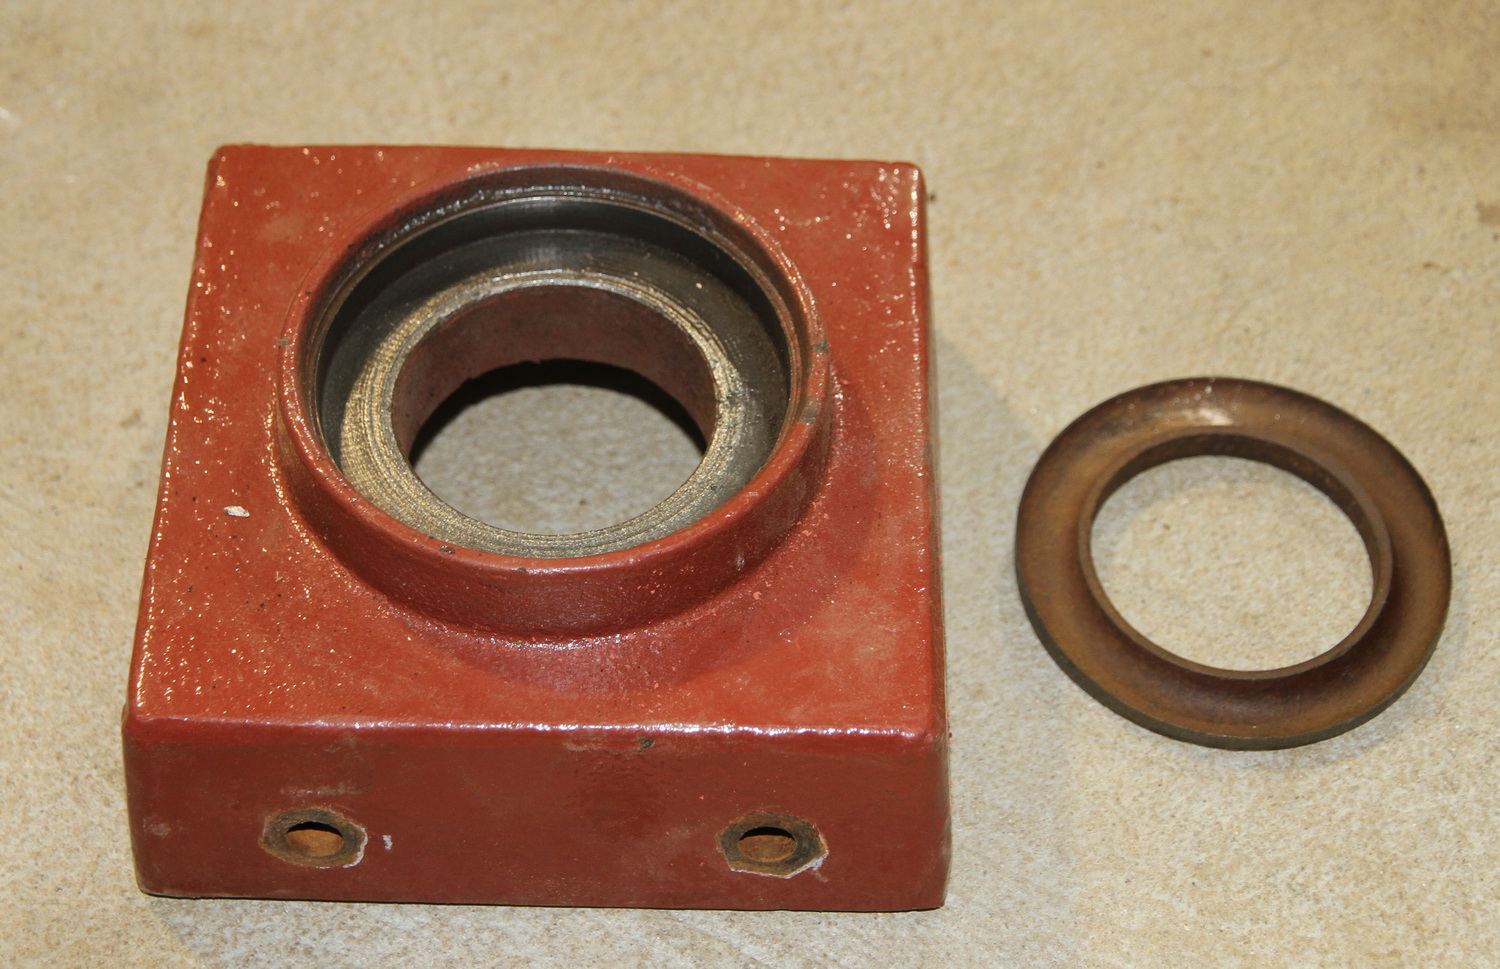
This old type bearing I replaced with a new thrust bearing. Of coarse it was not the exact push fit size. The original was probably hand made individually to fit the other cast and machined part. So what I had to do was centre the new thrust bearing and then I liquid steel filler around the bearing to hold it in place. The new bearing is a high grade machined steel and rotates very freely.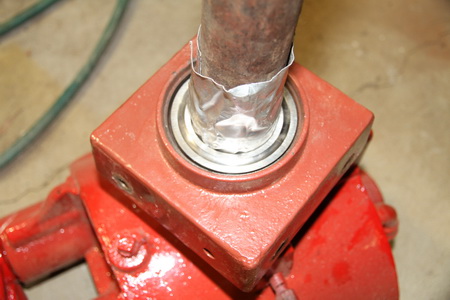
 Because the old bearing had probably failed while in operation and not been replaced at the time and the windmill was continued to be operated it caused some flow on effects wearing parts unevenly and damaging them.
The failure of the bearing caused the mast to operate at an angle. This out of plumb condition caused excessive wear on the lower part of the mast pipe both on the inside and outside as can be seen in the pictures below.
In fact the failure of this bearing is probably what lead the windmill to its ultimately catastrophic failure as the fan would now of been operating at an angle and hitting the windmill tower. This would have bent the vanes of the fan and perhaps stopped the wheel altogether.
There were signs that the windmill had fallen over at some stage as evidence of the fan being so damaged and out of round. However falling over may have happened when they where dismantling it. 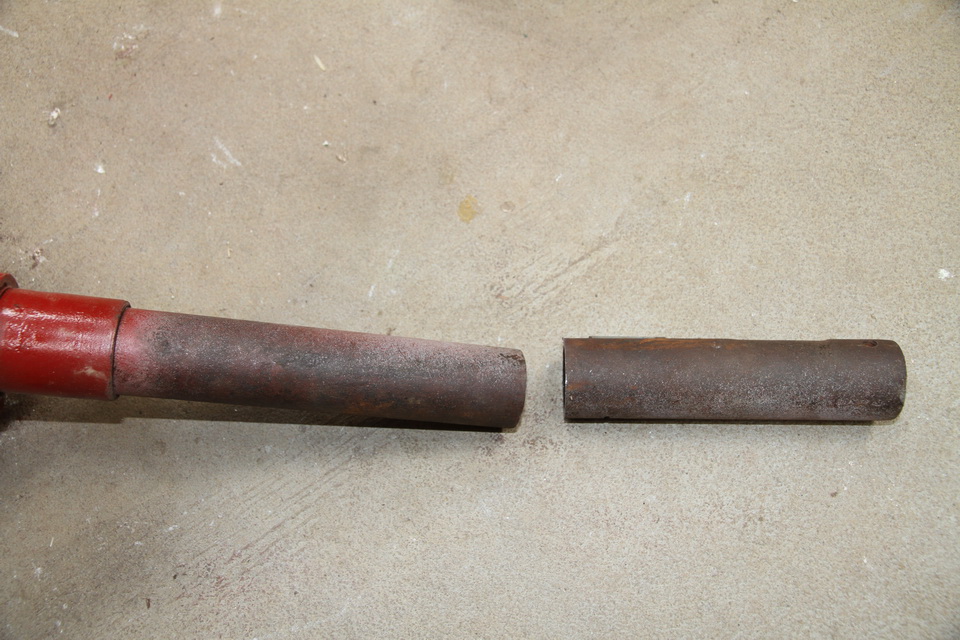
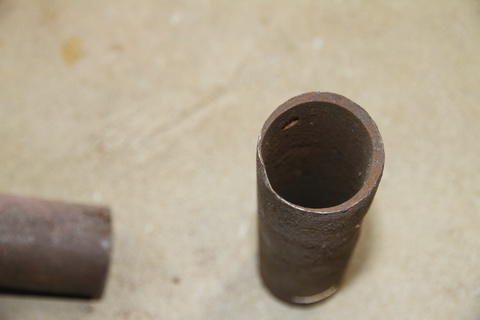
To repair the mast pipe on the gearbox I cut the worn section out, fortunately this size of pipe is still available today and I was able to then weld a new section in. To perform the weld I had to use some other pieces of U section steel that I could clamp to the pipe to ensure a nice square and straight joint. I could of just replaced the complete pipe however I really wanted to maintain as much of the original parts as I could that were practical to use again.
When cleaning the mast pipe up I found this logo on the pipe I don't know what company it refers to. If someone out there knows please send an email and let me know, It would be greatly appreciated. There are still some uncovered stories and mysteries with this windmill.
![]()
The next part that I had to make because it was missing was the tail vane support. I didn't take any pictures of this unfortunately, I didn't think of it until it was too late and assembled. This took me a long time to work out exactly what was down there under the gearbox to achieve this function. In the end I just used a solid block of 50mm by 50mm piece of steel cut to the correct size. The size was important though as it only had one hole to attach to the gearbox and it relied on being the correct length so as not to rotate. It had another hole drilled on the 90 degree side for the axle to sit in the other end of the axle was fitted to the gearbox. The axle was for the tail vane to connect to. This block had to be shaped so I shaped it with the grinder and grinding wheel to how I thought it needed to be, to operate correctly. To determine the shape I spent some lengthy time looking at a picture I had taken at Theo Cooks Windmill Park in Shepparton and doing a lot of reading about how the tail vane actually furled in strong winds.
It is a very simple yet clever design the fan is offset to the tail vane. When there is a lot of pressure pushing on the fan this becomes greater then the pressure on the tail vane holding it into the wind and cause's the fan to fold into the vane and move away from the direction of the wind. For the tail vane to rotate however it doen not to so on a completely horizontal axis and has to raise up as it furls. Thus the gravity on the tail vane restores it to a straight position when the wind pressure on the fan decreases.
For this to happen the block holding the tail vane has to allow the tail vane to rise as it rotates as does the hole in the tail vane attachment.